| Issue 100 | Nov 18th 2010 | Contact the Editor | How to Contribute |
|
| ||
|
LiveCode Apps for Mac App Store [Editors Note: There has been a lot of interest lately in the community in building for the new Desktop Mac App Store, with many queries about it in forums and support. I was delighted to be able to persuade one of the pioneers in this area to share his experiences with you. As already confirmed in our company blog post, we will be supporting submissions to this new venue, and are currently testing it ourselves to see if we need to make any changes to LiveCode to smooth your path. So far, it seems you can do everything you need to with the current edition.] This article is intended to guide you through my experiences in submitting my first Apps to Apples new desktop Mac App store. While I cannot cover every aspect you could face as each company will have different challenges hopefully you will find my experiences useful. How easy you find the process largely depends on how much you followed the human interface design guide in the past for Mac applications. Overall the process is not very hard. There really just some minor adjustments you have to make to your standalone build to allow you to move from deploying to Apple's current store to the Mac App store. I hope I may be able to give you some insight into the process by sharing what I've learned while submitting LiveCode, Intel based Mac applications for the store. Some key requirements: Firstly, you will need access to an Intel based Mac running the latest build of Snow Leopard. Secondly, you will have to join the paid Mac Developer Program. I notice many people have gotten the paid Mac Developer Program confused with the paid iOS Developer Program. Both are completely different, each program gives quite different tool sets for submitting applications. The iOS Developer Program gives you everything to deploy Livecode iOS mobile applications for iPod Touch, iPhone and iPad to the iOS App Store. The Mac Developer Program gives you everything you need to deploy Livecode Intel based Apps for Intel based Macs to the Mac App Store. I hope that clears up any confusion about that. Before you begin the process it is key to read over all the guidelines and legal documentation. If you have not in the past built and designed your Mac user interface to the Human Interface Guide you will need to start now. Your application needs to look, feel and work like a Mac application. Basically you need to follow the Human Interface Guide as now it is a requirement for acceptance. Saving Data
If your Application saves Pictures or Movies then you can access also the
Use the syntax specialfolder function and the TempName function to safely locate these directories. Writing to any other directories without the user choosing is prohibited. I have created a little demo stack you can download here, to help you identify permitted paths. Registration Screens Your Bundle Application Bundle ID Properties Application Icons Intel Only Digital signing To help you along, I have made a helper application called Signing Assistant for LiveCode bundles, which you can download here. This Signing Assistant gives you a GUI interface to the tools to digitally sign your apps for the Mac app store. The codebase of this app is locked. To use Signing Assistant you need to have joined the Mac developer program, downloaded and installed the tools and added your certificates from the portal to your Mac. Signing Assistant will check the system for these tools, if they are not found it will fail to work. Here is a little overview of the app.
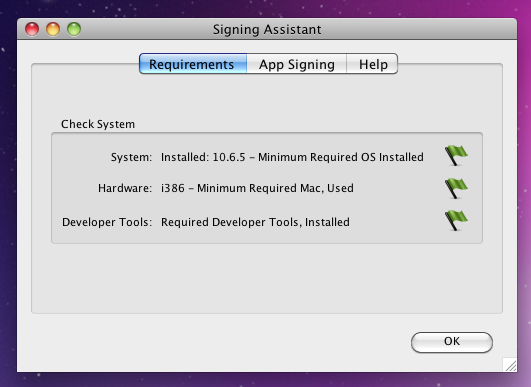
The Requirements Tab will check your system to see if this tool is ready to work. If the Tool shows a red flag it means you do not have all the installed requirements. System: check your system for OSX 10.6.5 or later, if it not installed it will red flag. Hardware Test: will check if you are using an Intel based mac. If you are not then it will red flag. Last it will check to see if the toolset needed is installed. If not it will red flag.
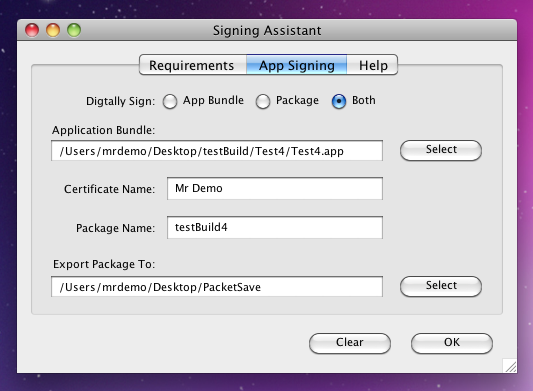
The App Signing Tab You can digitally sign just the app bundle, just a package or both at the same time. The Application bundle - allows for you to select your LiveCode bundle. The Certificate name is the name associated with the developer portal. This must match. Package Name: The Name to give your package (note do not use any spaces, you can use "_" instead of a space.) Export package To - If you select Package or Both the package will be exported to this location. If any field is empty Signing Assistant will exit the process and not sign. It is not necessary to use this tool, you can instead use the terminal and do it manually. The choice is yours! I hope this helps you understand the submission process, as you can see it is really quite easy if you follow the instructions and guidelines given by Apple.
| 

|