| Issue 160 | November 1st 2013 | Contact the Editor | How to Contribute |
|
| ||
|
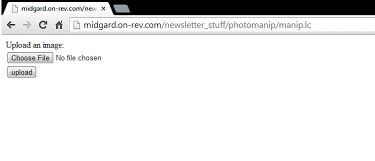
Cool Cat Server In this article, we're going to go over some new functionality that is going to be arriving in LiveCode Server with 6.5.0. Namely, that you will be able to use the graphics handling capability of the desktop IDE in the server environment. Please note that this functionality is currently in developer preview - it is available, here, but should be considered to be experimental until the full release of 6.5.0. The version I am using for this demonstration is 6.5.0 dp2. How does this work? Basically, stacks, cards, and their objects are rendered by the engine and can be manipulated via script as we would on the desktop IDE. Now, please note that this does NOT mean that the stack be displayed by the browser - that's impossible, as a browser needs to work with HTML. However, we can use the export snapshot command to create image files from the contents of our stack, and we can then display those with some html that we can generate from our script. This opens a whole new world of possibilities for using Livecode's extremely powerful image manipulation capabilities in a server environment. We're going to go through a simple example to exemplify the sort of thing we could use this for. We will allow the user to upload an image, and then do some very simple operations on it, using 100% livecode - no calls to external utilities, no other languages. We'll allow the user to modify the dimensions of the image, and also to apply some colour alterations. You can view the end result here: http://midgard.on-rev.com/newsletter_stuff/photomanip/manip.lc So, firstly, we're going to want to give the user a way to upload a picture that we can work with. There are a million ways to do this, we're just going to use a super simple POST upload with a form. We'll make a printForm handler to do this for us: on printForm put "Upload an image:<br>" put \ "<form action='manip.lc' enctype='multipart/form-data' method='post'>" put "<input type='file' name='imagefile'><br>" put "<input type='submit' value='upload'>" put "</form>" end printForm A sidenote about file uploads - you always need to be very careful when allowing the user to post a whole file onto your server. In a real world example, you would need to perform validation on the upload to make sure they don't upload a .php backdoor that they could use to take over your server. Here however, we're going to try and keep things fairly simple. This will display a form to the user that will allow them to upload a file that we can work with. Now, once we've got a file, we're going to want to do something other than uploading a form. So, our script should look something like this: <?lc start session ## enter the binary data of the image file into our $_SESSION # if one's just been uploaded if $_FILES["imagefile"] is not empty then put url("binfile:" & $_FILES["imagefile"]["filename"]) \ into $_SESSION["imagedata"] end if if $_SESSION["imagedata"] is empty then printForm ## no image has been uploaded so display the \ form to upload one else ## here's where we're going to do the fun stuff end if ## print upload form on printForm put "Upload an image:<br>" put \ "<form action='manip.lc' enctype='multipart/form-data' method='post'>" put "<input type='file' name='imagefile'><br>" put "<input type='submit' value='upload'>" put "</form>" end printForm stop session ?>
Now, because we're going to be posting back to this page multiple times, we're going to be using $_SESSION to hold all the various variables and image data that we're going to be working with. First, we check to see if $_FILES contains anything - if we uploaded an image, this will be contained in the $_FILES array. If it does, we store the binary data of the image itself in our $_SESSION array. Note that any time we handle the data of the image with the url() function, we need to use the binfile: specifier rather than the file: specifier as we are handling binary data. If $_SESSION[“imagedata”] is empty, then we need to get the user to upload an image, so we print the upload form and then do nothing else. If it is not empty, then we have an image to work with. let's expand that if statement to just show the image to the user: if $_SESSION["imagedata"] is empty then printForm ## no image has been uploaded so display the \ form to upload one else create image "myImage" set the lockLoc of image "myImage" to true set the text of image "myImage" to $_SESSION["imagedata"] if $_SESSION["random"] is empty then put \ random(10000000) into $_SESSION["random"] export snapshot from image "myImage" to file \ ($_SESSION["random"] & ".png") as PNG put "<img src=" & quote & ($_SESSION["random"] & ".png") \ & quote & "></img><br><br>" end if
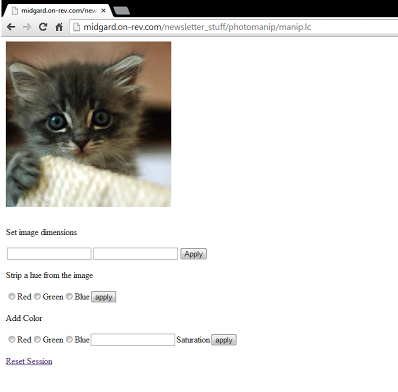
Here, we are creating an image, “myImage”. We set the lockLoc to true because this prevents any alterations to the properties of the image causing it to snap back to its original dimensions, which can happen under certain circumstances. We set the text of the image to $_SESSION[“imagedata”], which causes the binary data of the image we uploaded to be used as the source data for the image. We put a very large random integer into $_SESSION[“random”], as we're going to use this as the filename of the image that the user is working on during their session. Finally, we export a snapshot from the image to a PNG file, and we then create an <img> tag that points to the file where we created it. This will display the file that the use uploaded to them. That's pretty boring though, so let's expand that if statement a bit more to do some image manipulation. if $_SESSION["imagedata"] is empty then printForm ## no image has been uploaded so display the \ form to upload one else create image "myImage" set the lockLoc of image "myImage" to true set the text of image "myImage" to $_SESSION["imagedata"] repeat for each key tOption in $_POST if $_POST[tOption] is not empty then applyOption \ tOption end repeat if $_SESSION["random"] is empty then put \ random(10000000) into $_SESSION["random"] export snapshot from image "myImage" to file \ ($_SESSION["random"] & ".png") as PNG put "<img src=" & quote & ($_SESSION["random"] & ".png") \ & quote & "></img><br><br>" put url("binfile:" & $_SESSION["random"] & ".png") into \ $_SESSION["imagedata"] printOptions end if So we have 3 extra bits here - we have a loop that loops through $_POST and calls a handler “applyOptions” based on the contents. After we print the <img> tag, we also put the binary contents of the generated file into our $_SESSION array so that the changes we make are persistent. We then call a handler “printOptions”. The printOptions handler will print some forms that allow us to enter what we want to do, and then post our choices back to the page. It also will print a button that goes to a page that destroys our session so we can start over: on printOptions put "<p>Set image dimensions<br>" put "<p><form action='manip.lc' method='post'>" put "<input type='text' name='width'>" put "<input type='text' name='height'>" put "<input type='submit' value='Apply'>" put "</form></p>" put "<p>Strip a hue from the image<br>" put "<form action='manip.lc' method='post'>" put "<input type='radio' name='huestrip' value='2'>Red" put "<input type='radio' name='huestrip' value='3'>Green" put "<input type='radio' name='huestrip' value='4'>Blue" put "<input type='submit' value='apply'>" put "</form></p>" put "<p>Add Color<br>" put "<form action='manip.lc' method='post'>" put "<input type='radio' name='hueadd' value='2'>Red" put "<input type='radio' name='hueadd' value='3'>Green" put "<input type='radio' name='hueadd' value='4'>Blue" put "<input type='text' name='saturation'>Saturation" put "<input type='submit' value='apply'>" put "</form></p>" put "<a href='logout.lc'>Reset Session</a>" end printOptions That's pretty straightforward. We have three forms, one for changing the dimensions of the image (two text fields and a button), one for removing a particular colour from the image (3 radio buttons) and one for adding some colours to the image (3 text fields). Each form has a button to submit. The interesting one with the image manipulation code is the applyOptions handler: on applyOption pOption switch pOption case "width" if $_POST["width"] is not a number then put "WIDTH NEEDS TO A NUMBER<br>" else set the width of image "myImage" \ to $_POST["width"] end if break case "height" if $_POST["height"] is not a number then put \ "HEIGHT NEEDS TO BE A NUMBER<br>" else set the height of image \ "myImage" to $_POST["height"] end if break case "huestrip" put the imageData of image "myImage" \ into tImageDat repeat with x = $_POST["huestrip"] to \ the number of chars in tImageDat step 4 put numtochar(0) into char x of \ tImageDat end repeat set the imageData of image "myImage" to \ tImageDat break case "hueadd" if ($_POST["hueadd"] >= 0) and \ ($_POST["hueadd"] <= 255) then put the imageData of image \ "myImage" into tImageDat repeat with x = $_POST["hueadd"] \ to the number of chars in tImageDat step 4 put \ numtochar($_POST["saturation"]) into char x of tImageDat end repeat set the imageData of image \ "myImage" to tImageDat else put "NEEDS TO BE AN INTEGER 0-255" end if break end switch end applyOption So, what we have here is a switch based on the parameter pOption, which is derived from the $_POST array, which contains whatever options the user chose for altering the image. Each case in the switch performs a different operation on the image. The width case will just change the width of the image to whatever the user entered, similarly the height case will change the height of the image based on the user's input.
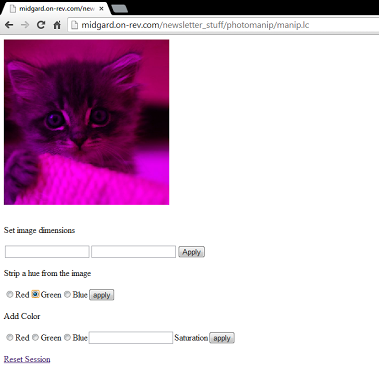
The more complex ones are huestrip and hueadd, both of which directly manipulate the imageData property of the image. The imageData property is essentially a bitmap representation of the image. Each pixel in the image is represented by a group of 4 characters (bytes) in the imageData, in sequence. The first character in each pixel is the alpha channel (transparency), the second is the red channel, the third green, and the fourth blue. Huestrip loops through the imagedata and sets either every 2nd, 3rd, or 4th pixel to 0, effectively stripping that channel out of the image.
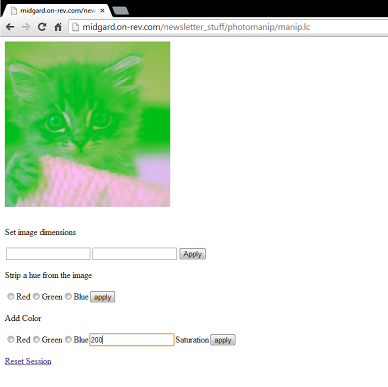
Hueadd works in much the same way, except that it adds the user-submitted value to every 2nd, 3rd, or 4th pixel.
You could of course perform operations infinitely more complicated than the very simple operations I'm doing here - anything is possible! Here is the code in full: <?lc start session ## enter the image file into our $_SESSION if one's just been # uploaded if $_FILES["imagefile"] is not empty then put url("binfile:" & $_FILES["imagefile"]["filename"]) \ into $_SESSION["imagedata"] end if if $_SESSION["imagedata"] is empty then printForm ## no image has been uploaded so display the \ form to upload one else create image "myImage" set the lockLoc of image "myImage" to true set the text of image "myImage" to $_SESSION["imagedata"] repeat for each key tOption in $_POST if $_POST[tOption] is not empty then applyOption \ tOption end repeat if $_SESSION["random"] is empty then put \ random(10000000) into $_SESSION["random"] export snapshot from image "myImage" to file \ ($_SESSION["random"] & ".png") as PNG put "<img src=" & quote & ($_SESSION["random"] & ".png") \ & quote & "></img><br><br>" put url("binfile:" & $_SESSION["random"] & ".png") into \ $_SESSION["imagedata"] printOptions end if ## apply an option to the image on applyOption pOption switch pOption case "width" if $_POST["width"] is not a number then put "WIDTH NEEDS TO A NUMBER<br>" else set the width of image "myImage" \ to $_POST["width"] end if break case "height" if $_POST["height"] is not a number then put \ "HEIGHT NEEDS TO BE A NUMBER<br>" else set the height of image \ "myImage" to $_POST["height"] end if break case "huestrip" put the imageData of image "myImage" \ into tImageDat repeat with x = $_POST["huestrip"] to \ the number of chars in tImageDat step 4 put numtochar(0) into char x of \ tImageDat end repeat set the imageData of image "myImage" to \ tImageDat break case "hueadd" if ($_POST["hueadd"] >= 0) and \ ($_POST["hueadd"] <= 255) then put the imageData of image \ "myImage" into tImageDat repeat with x = $_POST["hueadd"] \ to the number of chars in tImageDat step 4 put \ numtochar($_POST["saturation"]) into char x of tImageDat end repeat set the imageData of image \ "myImage" to tImageDat else put "NEEDS TO BE AN INTEGER 0-255" end if break end switch end applyOption ## print photo manipulation options on printOptions put "<p>Set image dimensions<br>" put "<p><form action='manip.lc' method='post'>" put "<input type='text' name='width'>" put "<input type='text' name='height'>" put "<input type='submit' value='Apply'>" put "</form></p>" put "<p>Strip a hue from the image<br>" put "<form action='manip.lc' method='post'>" put "<input type='radio' name='huestrip' value='2'>Red" put "<input type='radio' name='huestrip' value='3'>Green" put "<input type='radio' name='huestrip' value='4'>Blue" put "<input type='submit' value='apply'>" put "</form></p>" put "<p>Add Color<br>" put "<form action='manip.lc' method='post'>" put "<input type='radio' name='hueadd' value='2'>Red" put "<input type='radio' name='hueadd' value='3'>Green" put "<input type='radio' name='hueadd' value='4'>Blue" put "<input type='text' name='saturation'>Saturation" put "<input type='submit' value='apply'>" put "</form></p>" put "<a href='logout.lc'>Reset Session</a>" end printOptions ## print upload form on printForm put "Upload an image:<br>" put \ "<form action='manip.lc' enctype='multipart/form-data' method='post'>" put "<input type='file' name='imagefile'><br>" put "<input type='submit' value='upload'>" put "</form>" end printForm stop session ?> I hope this is enough to get you excited about the potential of LiveCode Server image handling!
| 
Tweet
|