Cannonball Tutorial! Page 1 | Page 2 [Editors note] We're delighted that Robert Cailliau is not only a keen Revolutionary, but has agreed to let us serialise his excellent tutorial in our newsletter. I hope you all have as much fun with this cannon as I have!
Goal
Profile: Robert Cailliau
Age: 60
Occupation: Retired from 33 years working at CERN in Switzerland
Notable Achievements: Along with Sir Tim Berners-Lee he worked on creating the World Wide
Web. Robert Cailliau is also the recipient of numerous international awards.
In this tutorial we will learn about graphics, user interaction and simulation. We will introduce the debugger. We will comment on object-oriented programming.
Do not get discouraged: the tutorial is long because there are quite a number of interesting things to discuss, but there are only 43 lines of code to write! And we will get interesting stuff to happen well before that.
Progress may sometimes be slower than you might wish, but the techniques learned are well worth the effort.
Program
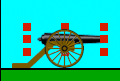
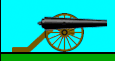
We will construct a cannon and draw the trajectory of the cannonball it fires. It will look somewhat like this:
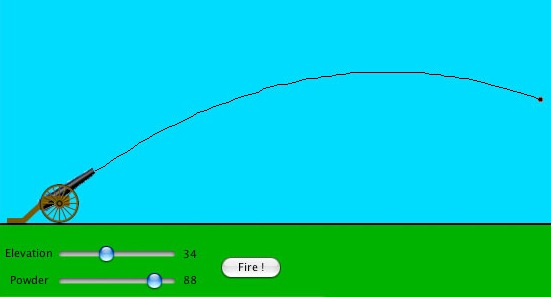
This is not just about programming: I will also have to explain the physics and how to simulate the physics.
First we will do the cannon images.
Images
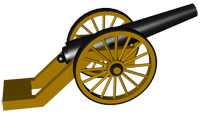
Using Cinema 4D I constructed a model of an old-fashioned field cannon:
That image is a bit too detailed and it is also in 3D. We are going to be less ambitious, so I rendered the cannon in profile only:
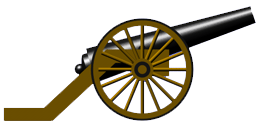
This is still far to large, and it also is a single image. We need a stationary carriage and a barrel that can turn up and down. That means two images: one for the carriage and one for the barrel.
Here are the actual images I used:
 
Both of these images need to be made as transparent PNG 24-bit images. You can make your own or you can just copy the ones from this page.
There are two little details about the barrel image:
- The barrel must rotate when we set the elevation. Rotating an image in Revolution happens around the image's centre. If the rotation must be relatively smooth, the width and height in pixels of the image should be odd numbers, not even numbers. My barrel image is 85 x 33. The odd numbers ensure that there is a pixel in the centre.
- The barrel
 must also rotate around its centre of gravity, where its axis is, and that lies more towards the end of the barrel than towards the nozzle. This means the image needs to be larger than the visible pixels. Here is the image with a border around it so that you can see the transparent part of it too. You can see that there is some empty space on the left of the barrel so that the centre of the image (the pixel in the middle) corresponds to the point around which the barrel should turn. must also rotate around its centre of gravity, where its axis is, and that lies more towards the end of the barrel than towards the nozzle. This means the image needs to be larger than the visible pixels. Here is the image with a border around it so that you can see the transparent part of it too. You can see that there is some empty space on the left of the barrel so that the centre of the image (the pixel in the middle) corresponds to the point around which the barrel should turn.
Make a new mainstack
Using what you learned in the Squares tutorial, make a new mainstack, use the stack inspector to call it Cannon
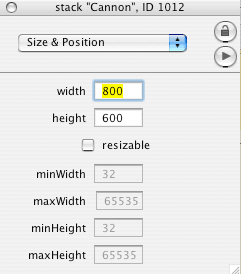
and save it. In the stack inspector, select and make the size 800 pixels by 600 pixels and click the resizeable checkbox off:
Warning: setting the height of the mainstack window to 800 pixels may make the title bar of the stack window disappear off the top of the screen, so you may not be able to move it anymore! Should that happen, set the height back to something small, move the stack window sufficiently far down, then set it to 800 again. You could also use the message box.
The Message box
Select . A small window appears:
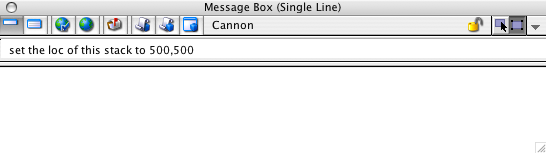
type the statement set the loc of this stack to 500,500 into the message box and press enter. The stack's window moves its centre to 500 pixels from the top and left of the screen.
The message box is useful to type single statements and see what they do, or to get out of a problem situation like when some window or object disappears off the screen.
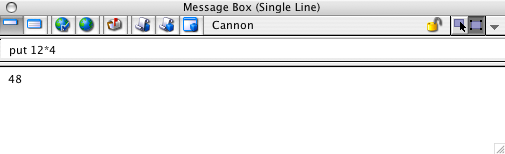
You can type anything into the message box that makes sense, even use it as a calculator:
The Sky and the Land
We will use two simple graphic objects to represent the blue sky and a grassy field. We will also use
the height of the grassy field to put some controls there for our cannon. Expand the tools palette by clicking the arrow at the
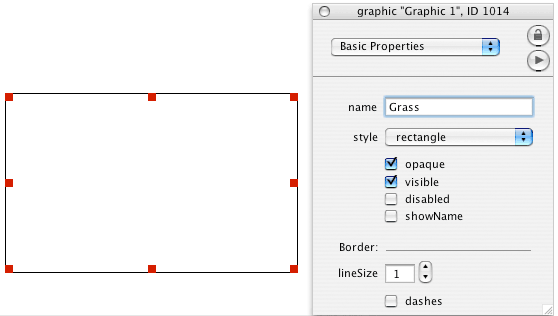
bottom and select the rectangle tool:  and drag a rectangle anywhere on the stack's window. With the inspector, call the graphic Grass. and drag a rectangle anywhere on the stack's window. With the inspector, call the graphic Grass.
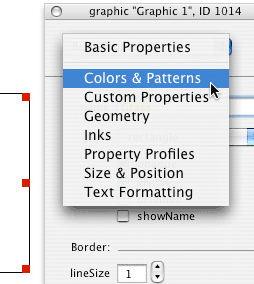
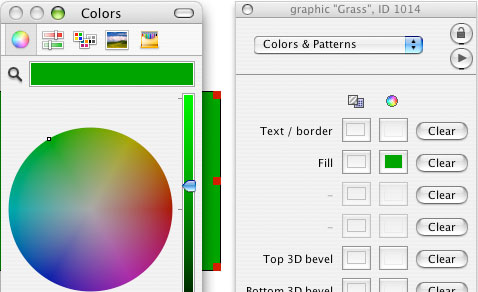
Use the inspector to select "Colors & Patterns", choose a nice dark green for the fill color of the grass:
Now we need to place the grass graphic at the bottom of the window. We can do this in three ways:
- By using the resize handles on the graphic and using our eyes. Not so good.
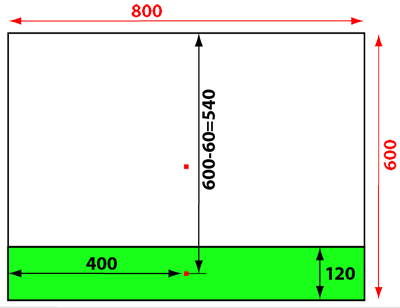
- By the Size & Position mode of the inspector:
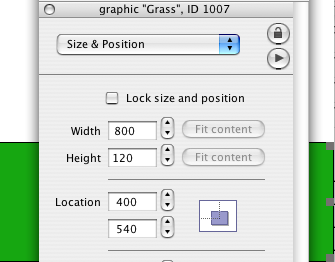
The window is 800 wide, so we use that width for the grass too. We make the grass 120 pixels high. It sits at the bottom of a window that is 600 pixels high. Therefore, its loc (the position of its centre) is 400,540. The loc of any object is the position of its centre. Position is measured from the top-left corner of the window.
- By typing in the message box: type successively these statements:
set the width of graphic "Grass" to 800
set the height of graphic "Grass" to 120
set the bottomright of graphic "Grass" to the bottomright of this card
That's a lot longer than using the inspector, but we did not have to calculate and it also gives us an idea of how to position objects from within scripts.
But why the bottomright of this card and not the bottomright of this stack?
That is because the card sits in the stack (see the first tutorial), but the stack sits in the computer's screen. The bottom of the stack is a number of pixels measured from the top of the screen, and that number changes when you move the mainstack window!
Now make the sky: create a rectangle, make it sky blue, 800 wide and 600-120=480 high and position it at 400,240. We get:
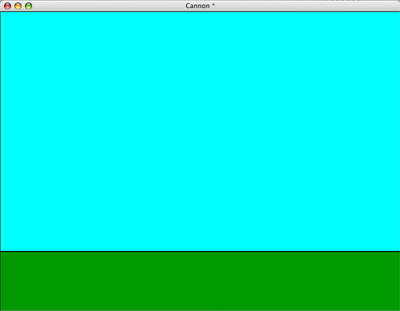
Time to put the cannon in this flat world of ours.
But first we must get a little organised: save your work and quit from Revolution.
Make order in your files
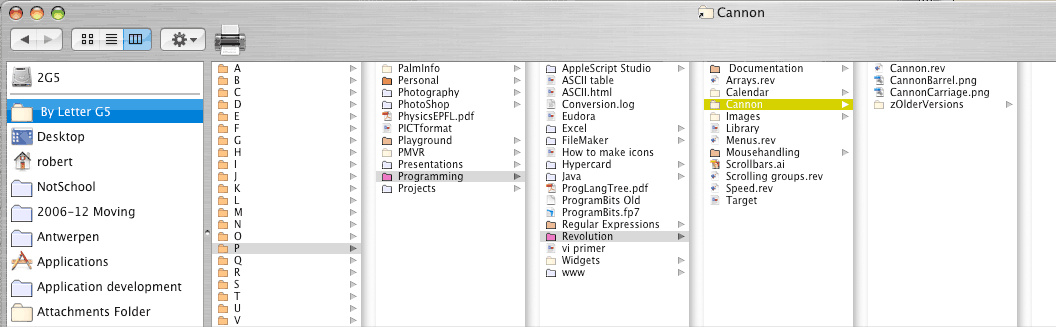
There will be several files before this project is finished. It's best to keep them together. Create a folder for this project, call it Cannon. Put in it the file Cannon.rev and also the image files CannonBarrel.png and CannonCarriage.png. These images are either the ones you made yourself or the ones you dragged off this page.
In my file system this looks like:

You may observe that I made a folder zOlderVersions, which I personally use to keep copies of the Cannon.rev program at each important stage. If I make a serious mistake, I can go back to an earlier version and do not have to start from scratch.
Place the images
Open Cannon.rev in Revolution. Select
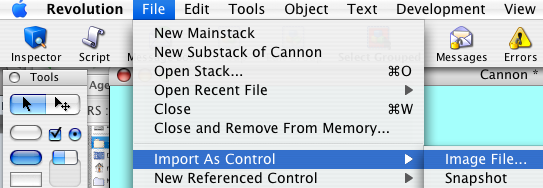
This lets you find the CannonBarrel.png file, choose it. Do the same with the CannonCarriage.png file. Because Revolution places imported images in the middle of the window, your mainstack window will now look like this:
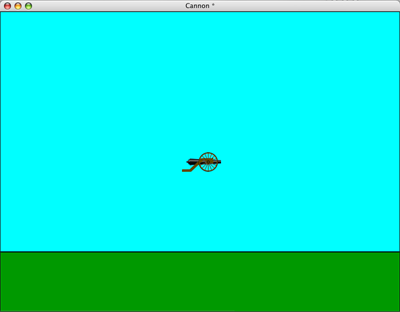
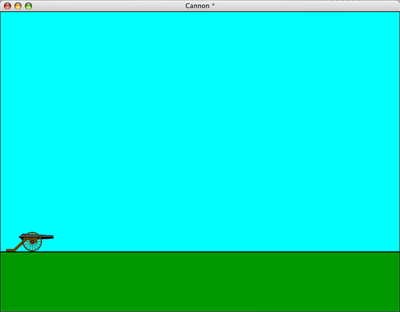
Click and drag the carriage to a position on the grass, at the left side of the window. Do the same for the barrel (be careful not to drag by the red selection handles or you will distort the image!). You will get something like this:
Position the barrel on the carriage. The barrel image has 8 selection handles (the red squares in the picture): one at each corner and one in the middle of each side. With the barrel selected, use the arrow keys on the keyboard to move the barrel pixel by pixel so that the selection handles in the middle are vertically lined up with the axle of the wheels.
Changing Layers of Objects
Every object is on a layer. If you have imported the barrel image after importing the carriage, then the barrel will be shown on a layer above the carriage:
and that's not what we want. To change which one is on top of which: first click the barrel to select it, then open the inspector if it is not already open, select Size & Position
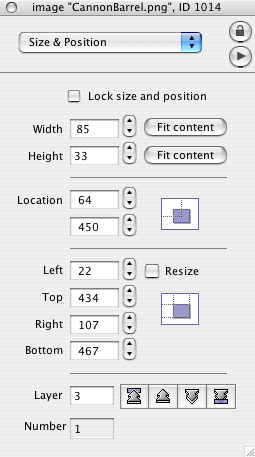
and press the  button to make the barrel go one layer deeper. button to make the barrel go one layer deeper.
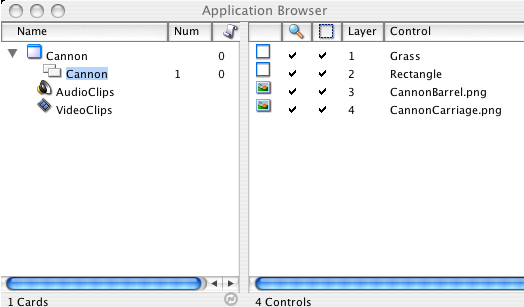
If you get lost or have trouble selecting, remember that there is the Application Browser (). There you can open the stack triangle, click the single card you will see, and then click in the right hand pane to select the object you want:
Good. We have:
We are ready to do some real stuff now.
Cannonball Tutorial: Page 1 | Page 2 |