Does adding a backend to your LiveCode application have to be hard?
Can't there be a backend database solution that uses LiveCode style syntax and design principles?
Do you really have to learn an entire new language like SQL to have a database?
In late 2013, the team at Canela Software asked ourselves these questions. After surveying the LiveCode ecosystem, we became convinced that there was a growing and legitimate need for a new kind of database, a database that "just worked". It had to be easy to use, powerful, and scalable. We distilled some of the core libraries from our internal projects, retooled them, and began developing the earliest form of what we now call LiveCloud, the first NoSQL, cloud-based database built with the same technology we code with every day. We are excited to finally be able to announce the beta release of LiveCloud, available today.
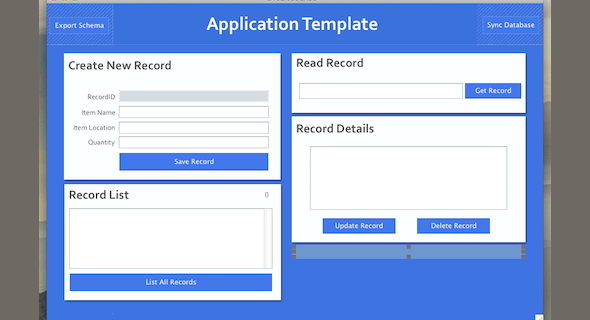
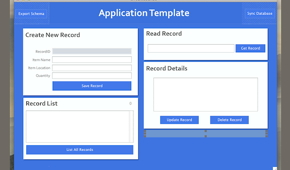
In this article we will learn how to sign up for a free LiveCloud account, download the Live Cloud Manager application, configure a LiveCloud database, and begin using the database in a meaningful way with a free sample stack, the Application Template. This template has all the CRUDL functions you would find in any other database.
If you are curious about the underlying concepts regarding how LiveCloud works, I recommend you read our blog post, 'LiveCloud Concepts'. We're also providing this information as a screencast accompanying this article.
Getting Started
First, visit our Downloads page and download the latest LCM:
http://livecloud.io/live-code-manager-download-page/
The LCM officially supports Mac OS X 10.6+, Windows 7+, Ubuntu 12.04+, and Linux Mint 16+.
After launching the LCM, let's first create a new account, or sign in if you've already done so. Next, let's setup a new database. You'll be automatically prompted to create your first database the first time you run the LCM. Let's call our first database 'DemoDB'. We can't finalize creation until we enter a schema, which we'll do next.
Next, download the Application Template here: http://livecloud.io/download/
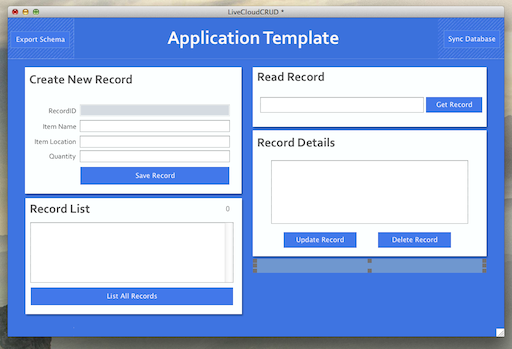
In order for the Application Template stack to function properly it assumes a specific database schema. You can copy this schema by launching your Application Template stack and clicking the "Export Schema" button. This copies a list of keys that we've pre-configured for this example to your clipboard.
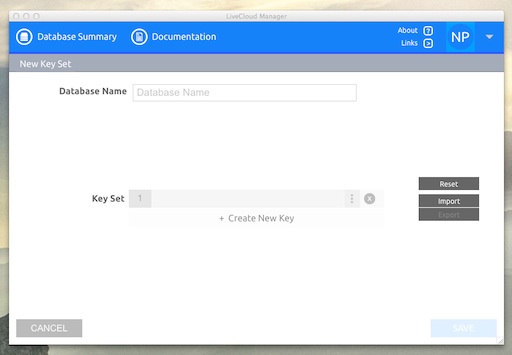
Now, let's switch back to the LCM. We are then able to import the keys into our new database by pressing the "Import" button in the LCM. You'll notice the fields are filled out automatically. Click "Save" to continue, then press "Done".
Next up, we need to tell our Application Template to load the LiveCloud libraries, so we can use the APIs in our application. We can copy the initialization code by pressing the "Copy to Clipboard" button. This will copy a preOpenCard handler, which we can then paste into the stack script of our Application Template. This code automatically loads the libraries and required directories for the database to function, and validates the API key associated with your account.
Note: LiveCloud, although primarily a cloud-based database, also has first-class support for local data storage.
Developing with LiveCloud
A complete reference of the LiveCloud API Documentation is available from within the LCM by clicking the "Documentation" button, as well as on our website.
If you've made it this far, your Application Template stack is now setup to begin making LiveCloud API calls to store, retrieve, update, delete, and query your data. To really experience the flow of how LiveCloud integrates with LiveCode, we highly recommend you watch the screencast at this point.
Basic Functionality
In simple terms, LiveCloud operates by taking a single LiveCode array and passing it to an API call, which would look something like this:
local tData
put "Nick" into tDataA["firstName"]
The array keys should correspond to the key names we setup in the database schema. After you've populated your array with the data you wish to store, we can write it to the cloud very simply:
put cdb_SaveRecord(tDataA) into tRecordID
After the record has been saved, the API returns a record ID (formatted as a UUID), which is a unique key for the record you just created. To retrieve the record we just saved, you would pass that record ID to the appropriate API. For example:
put cdb_getRecord(tRecordID) into tResultA
put "Hello," && tResultA["firstName"] && "!"
would output "Hello, Nick!" to the message box.
You should now have a basic understanding of how to configure LiveCloud to work with your projects, as well as how to make some basic API calls. Feel free to modify the Application Template to try out other API calls!
Although we really like LiveCloud, it is still a beta product. We would greatly appreciate any feedback on how we can continue to improve the product. |