|
Mobile devices are changing the way that business works, from how we interact to with our customers to how we manage our stock. LiveCode is a simple, easy to learn tool that lets people in all aspects of business get involved in this new mobile revolution.
This simple, easy to follow tutorial shows how to make a basic management application for the iPad. The app includes all the information normally stored in a standard stock management system and makes it accessible in the mobile space.
See how to create the interface, use iOS gestures and save the app on your iOS device. Full iOS features are supported and the data is directly editable and easily navigable.
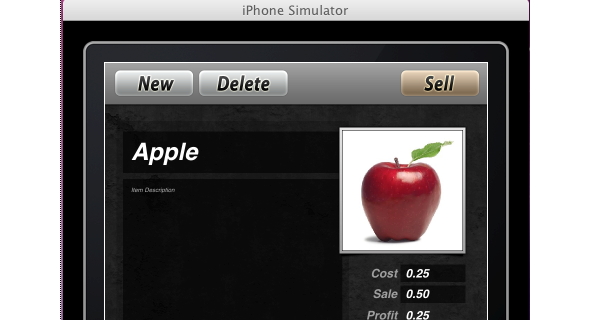
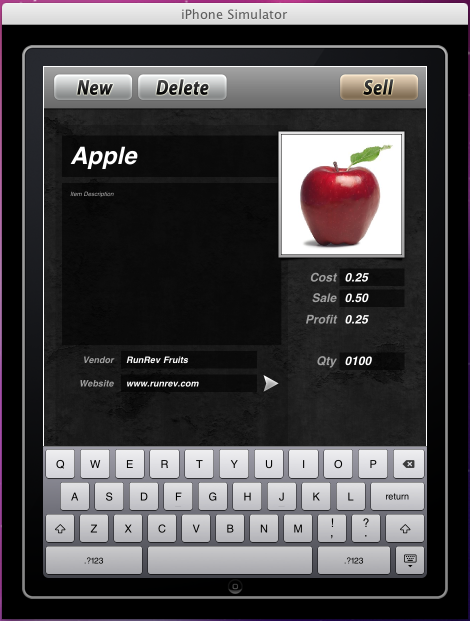
The Final Product
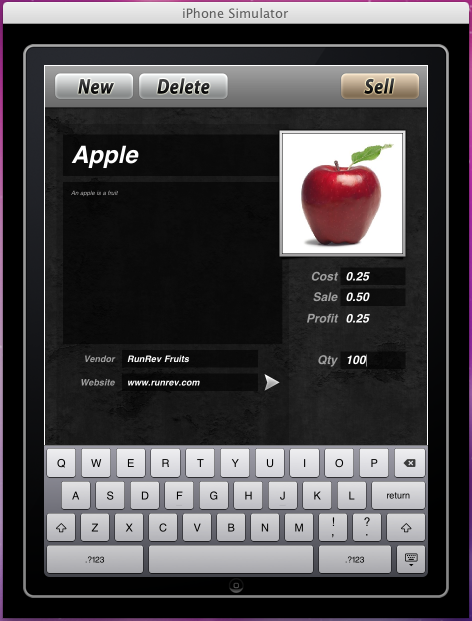
When you have completed this sample application you will have a fully skinned and working stock management application that allows users to add, edit and delete items.
What do we want to be able to do?
The first thing we need to think about is what we want the app to be able to do, what functionality do we need? In this case we are keeping it very simple, all we want to do is store information about our stock. We need to be able to add new stock items, delete items and update information. We would also like to be able to go to a vendor's website and automatically calculate the profit and value of our stock.
So the information we want to store for each stock item is:
name, description, image, vendor, vendor website, stock level, cost price and sale price
And the functionality we want is:
add item, edit item, delete item, go to vendor website, sell item, move between items, calculate the profit on an item, calculate the value of our stock
Of course we also want our data to be persistent between uses of the app so we need to save the data on the device.
Creating the Stack
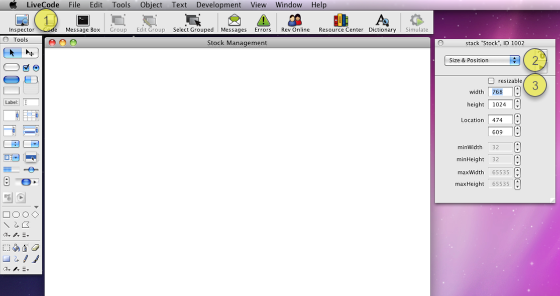
The first thing to do is to create a new stack by selecting New Mainstack from the File menu, open the Property Inspector for the stack using the Inspector button(1) and set the name of it to Stock and the label to Stock Management.
Then select the Size and Position pane in the drop down menu(2) and set the width of the stack to 768 and the height of the stack to 1024. This is the screen size of an iPad in portrait orientation when the status bar is not showing, if you want to show the status bar in your app then set the height of your stack to 1004 to allow 20px for the status bar. Turn off the resizable property(3).
Note: in this tutorial we will only allow Portrait orientation. When you have finished this sample application you could expand it to support landscape orientation.
Adding Controls to the Stack
Now we need to add fields to the stack to allow us to enter and display details and an image are to allow us to select a picture. We also need buttons to go to the vendor website, add a new stock item, delete a stock item, and sell a piece of stock.
You build your interface by dragging controls from the Tools Palette to the stack, you can select and drag controls on the stack to try different layouts.
Once you have added the controls to your stack use the Property Inspector to name them, for example I have named field 1 "description label" and field 2 "description". Giving controls memorable names makes them easier to refer to later in code.
Launching the Vendor Website
To go to the website specified in the "Vendor Website" field we can use the LiveCode launch url command.
Select the "Go to Vendor Website" button, open the Script Editor for the button and set the script of the button to
on mouseUp
put field "vendor website" into tVendorWebsite
launch url tVendorWebsite
end mouseUp
Selecting an Image using iPhonePickPhoto
It is simple enough to use fields to enter text data but what do we do about selecting an image? For this task we will use the iPhonePickPhoto command.
The command "iPhonePickPhoto" takes a single parameter that defines what type of choice to use, once the user has chosen an image the selected image appears on the stack and can be manipulated.
In this case we want the user to select in image from their library so we use the command iphonepickphoto "library"
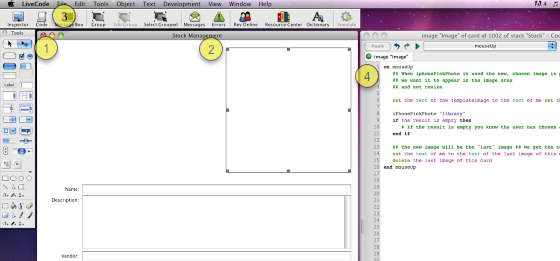
Using the Edit tool(1) select the image control(2), open the script editor(3) and set the script of the image(4) to
on mouseUp
## When iphonePickPhoto is used the new, chosen image is placed onto the stack
## we want it to appear in the image area
## and not resize
set the rect of the templateImage to the rect of me set the lockLoc of the templateImage to true
iPhonePickPhoto "library"
if the result is empty then
# If the result is empty you know the user has chosen an image and you can start working with it.
end if
## The new image will be the "last" image ## We get the text of it, set the text of the stock image and then delete the "last" image
set the text of me to the text of the last image of this card
delete the last image of this card
end mouseUp
This will only work on an iOS device so we will test in in the simulator later, and then on a device.
How Will the Information be Stored?
A LiveCode stack is made up of a series of cards. We will use one card per item, each card will store the information on a particular piece of stock. We can add new items by adding card, delete items by deleting a card and navigate through the stack by moving between cards.
Adding a New Item
To add a new item we want to add a new card to the stack. The new card should contain all the controls we have set up ready to be populated with the information about the item.
There is a simple way to do this in LiveCode. By grouping the controls together and setting the Behave Like a Background property of the group to true the controls will automatically be added to any new cards that are created.
To do this select all the controls, choose the Group option in the menubar(1), then select the group, name it "controls" (2) and set the Behave Like a Background property to true(3).
The only control we can't include in the group is the image control, this is because the image data is not distinct for each card when contained in a background so we will copy the image to each new card separately.
Scripting the New Button
Now that we have created our background we need to script the New button to create a new card and create an image area. Select the New button, open the script editor and set the script of the button to
on mouseUp
newEntry
end mouseUp
The newEntry handler is on the stack script, which can be opened from the Object menu
on newEntry
## Add a new card
## This will create a new card with the controls group on it
create card
## The long name is a unique identifier
put the long name of it into tNewCard
## We need to create an image separately on the new card as image data is shared
copy image "stock image" of card 1 to tNewCard
set the text of image "stock image" of tNewCard to empty
## Put the initial text into the fields
send "resetControls" to group "controls" of tNewCard
## Go to the new card using a visual effect
visual effect push left
go to tNewCard
## Put the cursor in the name field
focus on field "name" of group "controls" of tNewCard
select after field "name" of group "controls" of tNewCard
end newEntry
Moving Between Records
Once there is more than one item in the application we need to be able to move between them. As this is an iPad app we want to use a sliding movement to move between records. When moving forwards through the items the old item should slide off the left hand side, when moving backwards the old item should slide off the right hand side.
This effect can be achieved using the command
visual effect push left
The following handler is on the stack script, along with the equivelant moveBack handler. Placing it on the stack script makes it accessible to all the buttons and cards of the stack
on moveForward
## If the current card is not the last card go to the next card
## If the current card is the last card circle to the first card
put the number of this card into tCurrentCard
put the number of cards of this stack into tNumberOfEntries
if tCurrentCard < tNumberOfEntries then
visual effect push left
go to the next card
else if tCurrentCard = tNumberOfEntries then
## Go to the first card
visual effect push left
go to the first card
end if
end moveForward
Using Swipe Gestures
We want to be able to move between records by swiping left or right and moving through the items accordingly. LiveCode provides touchStart, touchEnd and touchMove messages allowing you to detect swipe gestures. By recording the start and end points of the touch and calulating how far the user has swiped, and it what direction you can detect and handle swipe gestures.
These commands are handled on the stack script
on touchStart pID
## When the user touches the screen
put empty into sCoordinateArray["start"]
put empty into sCoordinateArray["end"]
end touchStart
on touchMove pID, x y
if sCoordinateArray["start"] is empty then
put x into sCoordinateArray["start"]
else
put x into sCoordinateArray["end"]
end if
end touchMove
on touchEnd
put sCoordinateArray["start"] into tStart
put sCoordinateArray["end"] into tEnd
## Compare the x coordinates of the start and end point
## This tells us the direction of the movement
if tStart is not empty and tEnd is not empty then
if tStart > tEnd and tStart - tEnd > 100 then
moveForward
else if tStart < tEnd and tEnd-tStart > 100 then
moveBack
end if
end if
put empty into sCoordinateArray["start"]
put empty into sCoordinateArray["end"]
end touchEnd
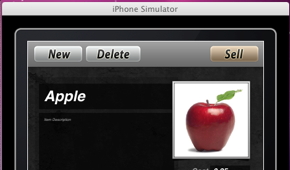
Testing on the Simulator
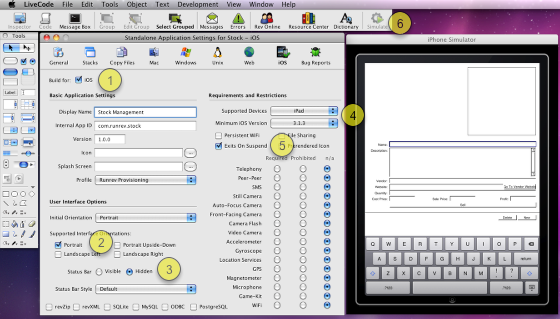
At this stage we will try using the iPad simulator to test the app. Save your stack, open the Standalone Application Setting from the File menu and go to the iOS pane.
1. Select build for iOS
2. Select Portrait under User Interface Options
3. Hide the Status Bar
4. Select iPad as the supported device and choose the minimum iOS version
5 Select Exits On Suspend
Then click the Simulate button(6) and the app will be lauched in the Simulator
Editing an Item
Editing an item couldn't be simpler. You just click in the field and edit the content.
Deleting an Item
As mentioned earlier we can delete and item by deleting the card that holds its information. Open the script of the "Delete" button and set its script to
on mouseUp
deleteEntry
end mouseUp
The deleteEntry handler goes on the stack script
on deleteEntry
## Delete the current card
visual effect push left
delete this card
end deleteEntry
When a card is deleted the next card is shown automatically. By setting the visual effect first the effect is used to show the next card.
Using a Launcher App
If we just build our application into an iOS standalone it wil work fine but we won't be able to save our data as you cannot save changes to an standalone application. Instead we need to create a launcher application, which in turn launches a version of the Stock Management stack which can be saved.
We save the launcher as standalone and include the Stock Management stack in the application bundle.
iOS imposes strict controls over what you can and cannot access so we use the specialFolderPath function to access the documents folder, this is the folder in which the application should store any document data.
When we first launch the application we copy the Stock Management stack to the documents folder and launch it from there, when saving the stack we save it back into the documents folder. The next time we launch the application we launch it directly from the documents folder as this is the version containing the information.
Saving the Stack
We want to save the stack when the app is closed so that our data is available the next time we start up the app. When the app is closed a shutdown message is sent so we need to add a shutdown handler to our stack script, this uses the save command to save the stack.
on shutDown
## When the app is closed save it to preserve data
save stack "Stock" as (specialFolderPath("documents") & "/Stock.livecode")
end shutDown
Building the Launcher App
To create a launcher stack we create another iPad sized stack, name it Stock Launcher and set the label to Stcok Management. This stack shouldn't be seen but we will set the background color to black in case it is seen while the main stack is launching. You can add a "Starting Up" message if you like.
Open the script editor for the stack and add the following handler, this launches the main stack.
on openstack
## The first time the app is started copy the Stock stack
## from the application bundle to the documents folder where it can be saved
## The next time the app is started launch the Stock stack in the documents folder
put specialFolderPath("documents") & "/Stock.livecode" into tMainStackPath
if there is not a file tMainStackPath then
## This is the first time the app has been run
put specialFolderPath("engine") & "/Stock.livecode" into tOriginalStackPath
put url ("binfile:" & tOriginalStackPath) into url ("binfile:" & tMainStackPath)
end if
## Launch the main Stock stack
go stack tMainStackPath
end openstack
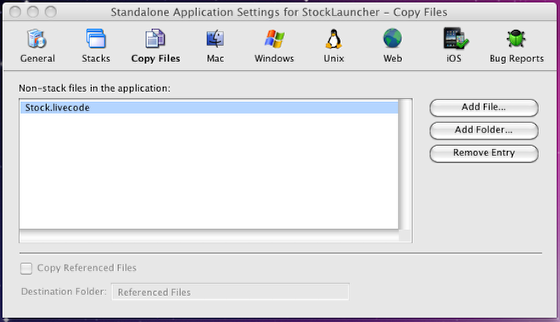
We then build the launcher stack into a standalone application(with the same settings as before) including the Stock Management stack as a file.
Testing on the iPad
You can now deploy your app to an iPad and do some testing. Ensure that the gestures work, that you can add, edit and delete stock items and that your data is still there the next time you start up the stack.
Skinning the App
To make the app more attractive you can do some very simple skinning. In this example we have simply used a background image and some button icons. These are all available in the zip file attached to the tutorial.
Import the background image using the Imort as Control option in the File menu. Then use the Size and Position pane of the Property Inspector to set the layer of the image to 1, this means it will be below all the controls. You can then move the fields, image area and buttons around to achieve the desired layout.
For a more detailed lesson on customizing the appearance of LiveCode apps please see the Skinning lesson. This goes into detail more detail on using background images, button icons and window shapes.
|